Introduction
There’s articles/videos online making Nato watch straps. Quite a few use a sewing machine and most are a straight copy of the standard format – size and construction wise. Some straps commercially manufactured abroad are very small, clearly to fit locals not ‘big boned’ foreigners. Might be saving a few pennies too? One of the biggest problems I’ve found is the one size fits all concept. This means the strap fits nicely if you have thin wrists, but you end up with a big flappy bit of strap hanging out. Tucking it away is the strap equivalent to having your older brother’s trousers on – turned up 4 times and with a safety pin in the waist band.
Alternately a larger wrist results in the buckle/furniture sitting on your wrist bone and a small flappy bit of strap left over that won’t fit the keep. Stupidly too short. (Remininscent of your previous trousers, before you got your brother’s – amusingly he got a pair of your Dad’s. Who’s laughing now! – Well, not anybody under the age of forty – they’re just saying ‘wtf you talking about?’ )
The average mans wrist is around 18cm – mine is closer to 21cm. The standard buckle sits on the side of my wrist not the underside. Not comfortable.
Comfort is only one plus for me. I can also dictate the quality of the strap. No faux leather or the bonded kind (This is basically ground up leather reconstituted into a new material.). You can also fit the original buckle and personalise the strap to suit you, or the watch itself.
..but is it cost effective?
People will always question the cost and time involved. Yes, you can buy a reasonable strap for acceptable money. However, remember that what you are making is a custom strap and the quality should hopefully be high. Some of the handmade Nato straps online go for 50£/$ and on up, and they’re still universal and not made to fit the owner. If you are wearing something custom that looks nice and sits well on your wrist, an item that people comment positively on, and makes you feel proud to have made…how much is that worth?
Always be wary of those who know the price of everything
and the value of nothing
Materials
First off let’s have a look at the three main areas to be addressed when gathering your bits and pieces together;
Leather
This is a pretty easy resource to get hold of. You may have forgotten that old belt that you like but due to your increased abdominal ‘muscles’ – yep, the ones you got from the takeaway and pub – no longer fits well. Perhaps you have other old leather items lying about that may enjoy another lease of life. Although the blank is likely to be 15 -19 inches long in order to make your strap, it can be made up of two pieces joined together. More on that later.
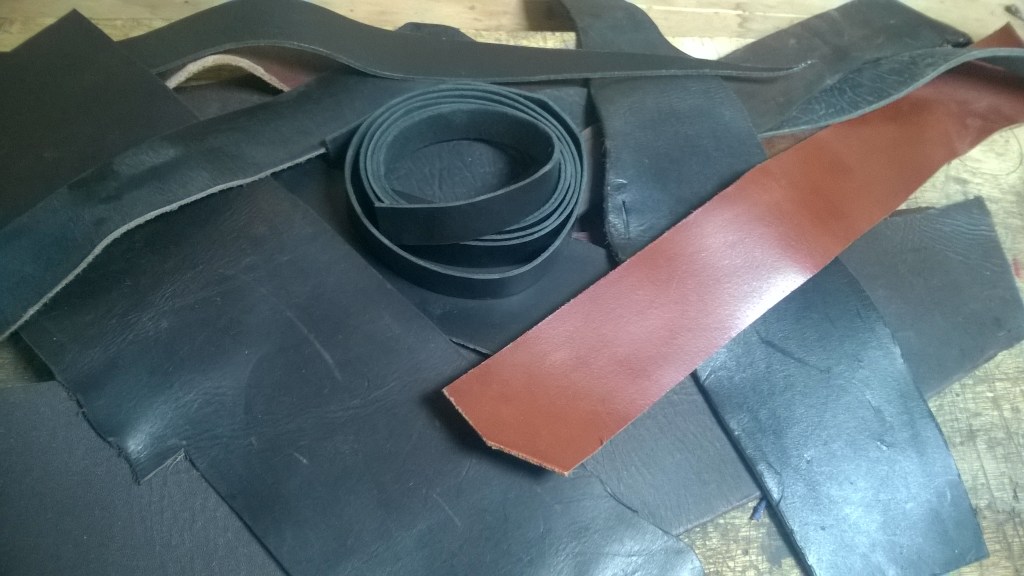
Offcuts and scraps can be bought online. Much of this is very nice quality and of a natural finish which looks lovely. This is one of the best and most economic avenues to explore. You can expect around four blanks from a 6 x 12 piece (with joins). Thickness needs to be around 2mm and above. Thicker leather can be thinned (skivved) – again that will be discussed further on.
Belt blanks (centre of image) can be bought online from auction sites. A 22mm x 5ft belt blank will give 3 strap blanks with some left over for a strap keeper (loop) or two. 22mm is a common watch strap size. Alternatively pay a little more for a 50mm (2″) belt and cut 6 blanks of mixed 22, 24, 26mm widths or whatever other size you need. Again thickness is relevant and all options are open if you are happy to thin straps down. A 22mm belt blank has cost me on average £7.50/$10 so far: for some very nice quality leather at less than £3 a strap blank.
Leather salvaged from sofas/settees/couches can be okay, but on the whole problematic with the exception of very high quality seating. It is either poor quality or so supple that it stretches too much. Alright for the mother-in-laws extra wide butt, not so good for straps. The strap stretches and narrows with use, and this type of leather looks scuffy within a very short time. Avoid.
Fittings (Furniture)
The average nylon Nato strap comes with 5 rings – one doubling up as the buckle. I make mine with 3 plus the original watch buckle and a leather keep. There are times when the original buckle isn’t suitable. Usually because the strap fitted from new tapers – for example – from 22mm lug width (the watch) to 20mm at the buckle end. As the Nato strap is parallel – the lug and buckle being the same size – this narrow buckle is going to be a non starter. Put it somewhere safe, it may be you need that size in the future. Amazon sells a variety of buckles in singles and packs with a variety of finishes. Fairly inexpensive, 2-3£ each, and good quality – if you take the time to choose well and don’t just pick the first thing you see. Other online business sellers also stock parts.
“Time spent in reconnaissance is seldom wasted.”
Attributed to multiple authors and always contested.
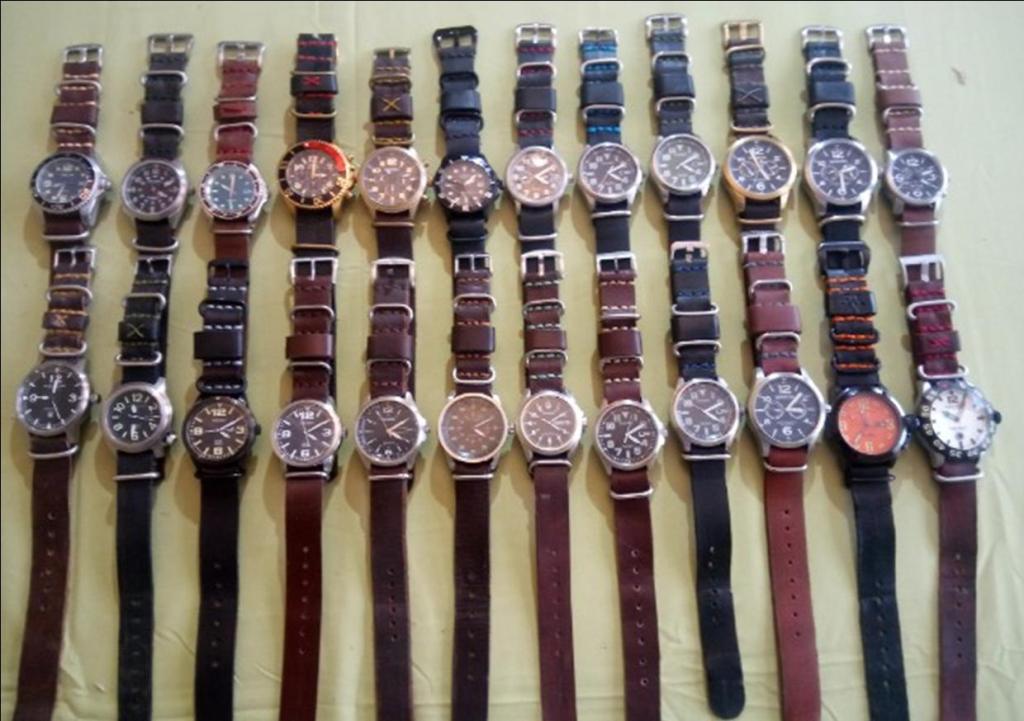
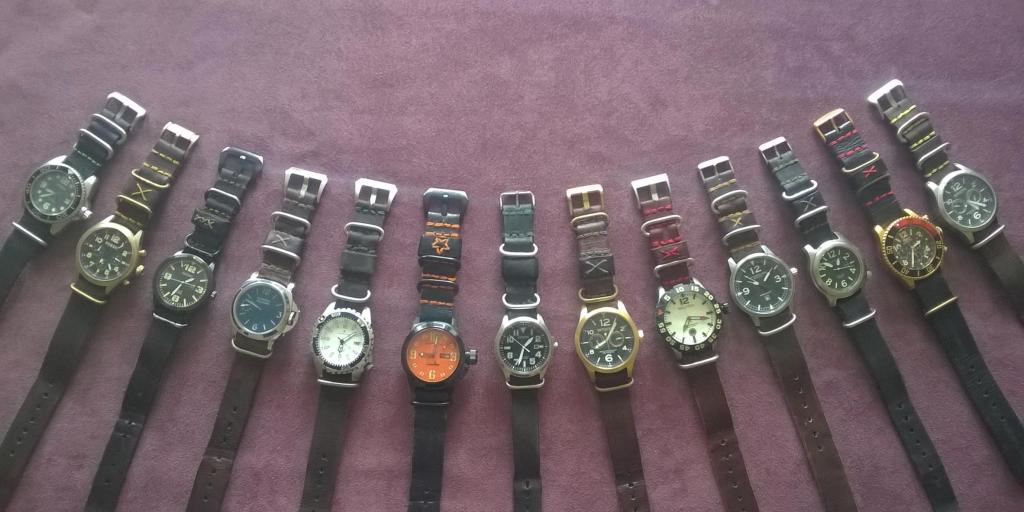
Harvesting from a new nylon strap is the easiest way to get the rings. I recently bought 2 straps for less than £9/$11 delivered. Ten rings equals 3 straps and a spare. Because I use the webbing for other projects I cut the stitching and slide the rings off rather than butchering the strap. I find it just as easy. The donor straps need to be of the ‘Zulu’ type. These are shown in the image below – predominantly on the left, a couple ringed in orange for clarity. The rings are solid, welded, and invariably stainless steel or brass. Those ringed blue are the common early/issue type. These rings are usually thin pressed chromed (ish!) steel of often dubious quality. Additionally they are too narrow to take a good thick strap. They look crappy and the buckles are mostly tinny and unusable (the black ‘panerai’ style {btm} is fine).

Finally, the most difficult but arguably the most rewarding – Making your own rings. When I first started making these straps 12 years ago some sacrificial straps were hard to find, particularly the ones sporting brass rings. Thankfully they are now much more common. However, a few years ago I had to make my own brass rings. This involved using a vice and hammer to bend 3mm (1/8″) brass rod around a former – this was an old spanner with one end cut off with the centre span being 22mm across. I would have needed to make another former for 20 or 24mm rings. It’s a challenge but an option. Iv’e used the same method to make thicker rings using 75 x 3.5mm stainless steel nails. Often considerable clean up (from the vice and hammer) is needed.
Thread
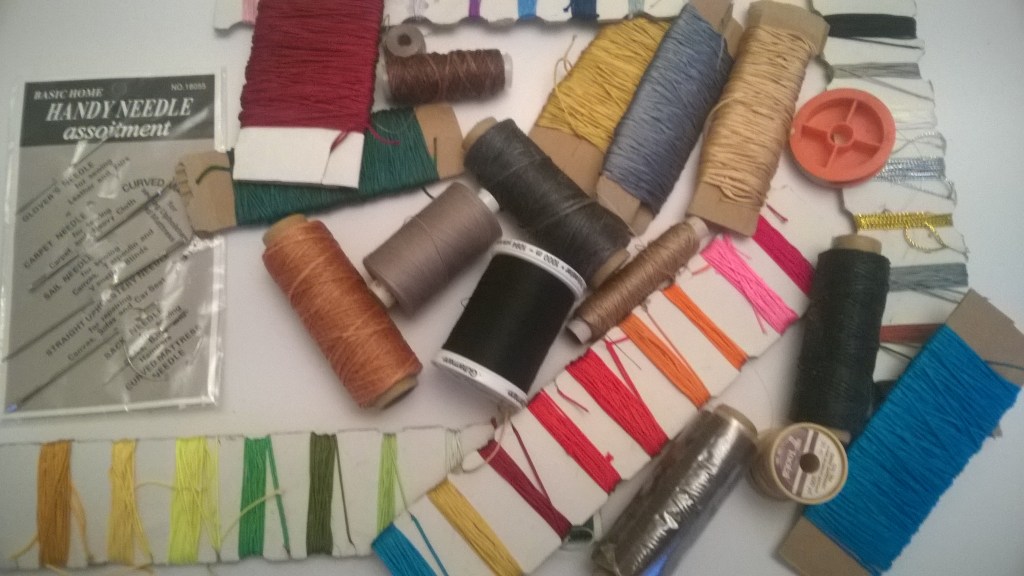
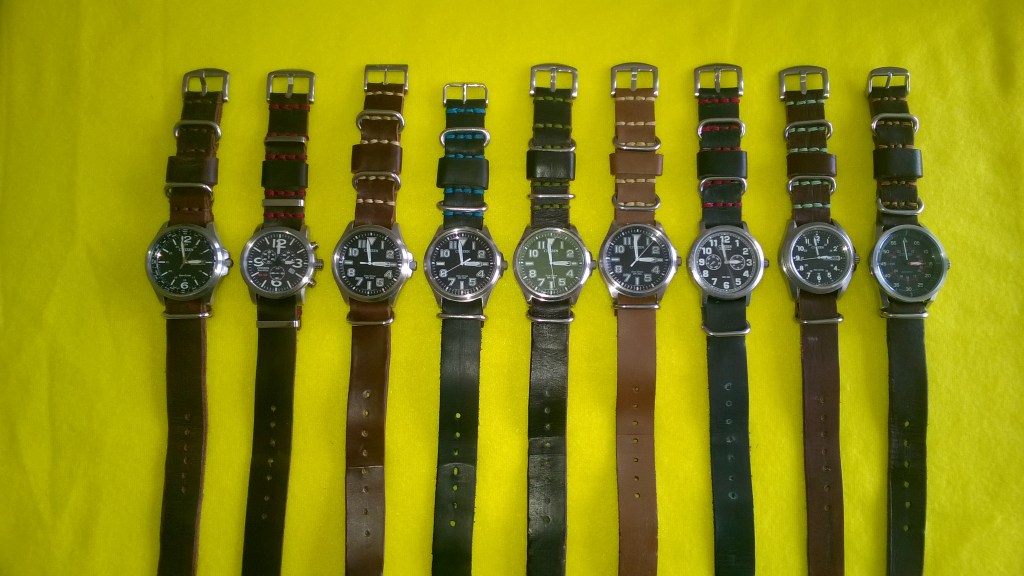
As you can see from the images I use quite a few different colours for my straps. Mostly I use what is termed shamballa (rat tail) cord. I believe this is a fairly widely used term. Many colours are available – it’s the stuff wound onto card in the image above. It’s made of nylon – it doesn’t fade or breakdown very quickly – and at 1mm thickness it’s ideal. You’ll need around a 1.2metre -4ft per strap but the cord is very cheap. Five metres is around £1.70/ $2 last time I looked. Other sizes are available but this size provides a perfect balance between aesthetics and strength. I have used standard thread; nylon, kevlar, polyester etc of varying thicknesses but the visual impact isn’t what I want. I also use the standard leather waxed thread which looks good on certain straps – more subdued and rustic. Also there is a 1mm waxed cotton cord which is very nice. It’s all a matter of personal taste, and it’s maker’s choice!
If you’ve been adding up as you go along 3 x blanks, 3 x sets of rings and your thread comes to about £22/$24 – if you reuse your original buckles. New buckles would push it towards £30. So 10 quid or 12 bucks a strap.
Sounds good… but what about the tools I’ll need?
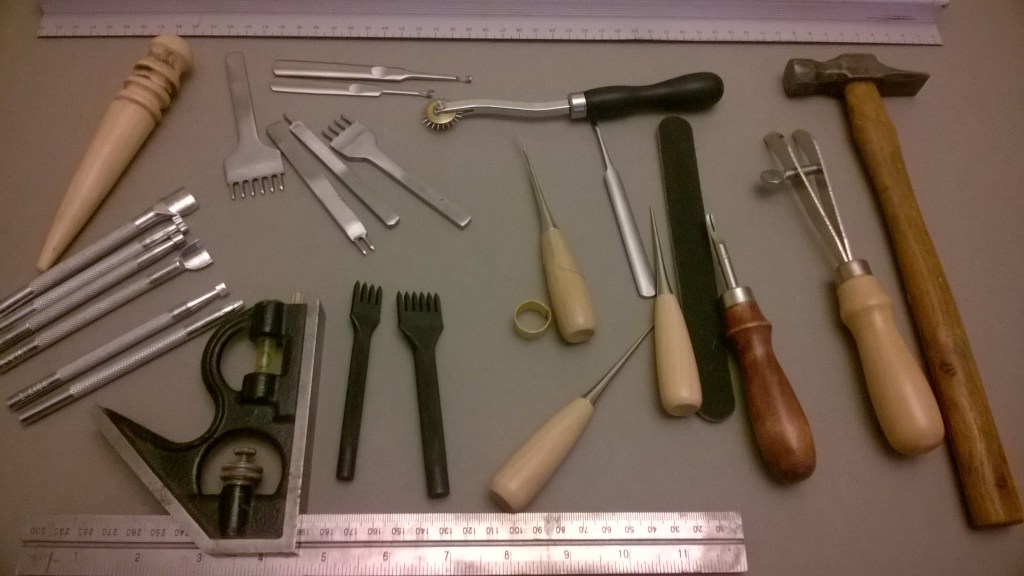
The tools required are few in number and you may have some already if you use your hands (in making, fixing, building, repairing activies that is)…
- A good robust sharp knife. A Stanley knife is perfect. Leather is tough and a skimpy cutting tool just won’t do. It’ll make a mess of your workpiece.
- A steel rule. Cutting the blank cleanly and accurately makes for a better result. If you buy a 2.5mm x 22mm x 150cm blank you will minimise cutting and, by inference, mistakes.
- Some needles. These will need to be the heavier type than normal sewing needles. Standard sizes ‘eyes’ will not allow thicker thread through nor withstand the rigours of being pushed through leather. A couple of quid online.
- An Awl. These are inexpensive online. You can always improvise with a nail and a hammer to drive it. You’ll be using it to make stitch holes. The three in the centre of the picture above are okay but can be soft, and the tapered blade enlarges holes well. The ones online that look like gearstick knobs with parallel blades are a tiny bit cheaper but not as good, the handle and the blade often decide to separate. £2- £4 each.
That’s it for basics. These items will get the job done. Some bits, like a hole punch, will be very cheap, a set less than a fiver. Of course if you think you’ll be making more then a small leather craftset from Amazon, containing thread, needles, awls etc.., costs just a few pounds, some are less than £6. Probably a good option from the outset. I started with something similar and have fixed bags, zips on boots and a split in the kids’ sofa using the items within. Bargain!
What size is good for me ?
Ooohhh No Matron! – Not lines from ‘Carry on Making a watch strap’, but vital if your comfort and aesthetics are paramount.
The goal is to site the buckle of your strap bottom centre of your wrist. This buckle was £5 Amz for 2: Solid satin stainless steel.

This buckle ‘end’ is the focal point of the strap. If you get this spot on it’s fairly plain sailing from here. Told you it was easy! The measurement around your wrist is the other necessary number you require. I suggest you clench your fist when doing this to prevent the strap being initially too tight when you naturally grab a door handle, tool, mug of tea… If you don’t own a cloth tape measure use a piece of non stretchy string, ribbon, cloth, paper (thick -ish) etc, and mark and measure against a solid ruler.
Onto Part 2.
