The usual safety provisions apply. I won’t insult the capable but for those who are a little vague on what’s under discussion please read the safety stuff on the Information page.
Introduction
I’ve been messing around with hand tools as long as I can remember. Carpentry was my Father’s business. Older and vintage tools have always held an attraction for me and I own – and use – a decent collection including Norris, Mathieson, Disston, Preston and other names from days long past. By my reckoning if they’ve lasted a century or more in working order they’ll last at least another one.
The comparible modern stuff looks unlikely to function well or last even a fraction of that time. Of course you can buy some great planes today, made by upmarket companies: the performance is excellent and they feel good in the hand. However, a large chunk of cash is required to secure such an item. So the question arose: what would it take to make something cheap and modern perform and please the user as much as one of it’s ancestors?
The victim is selected
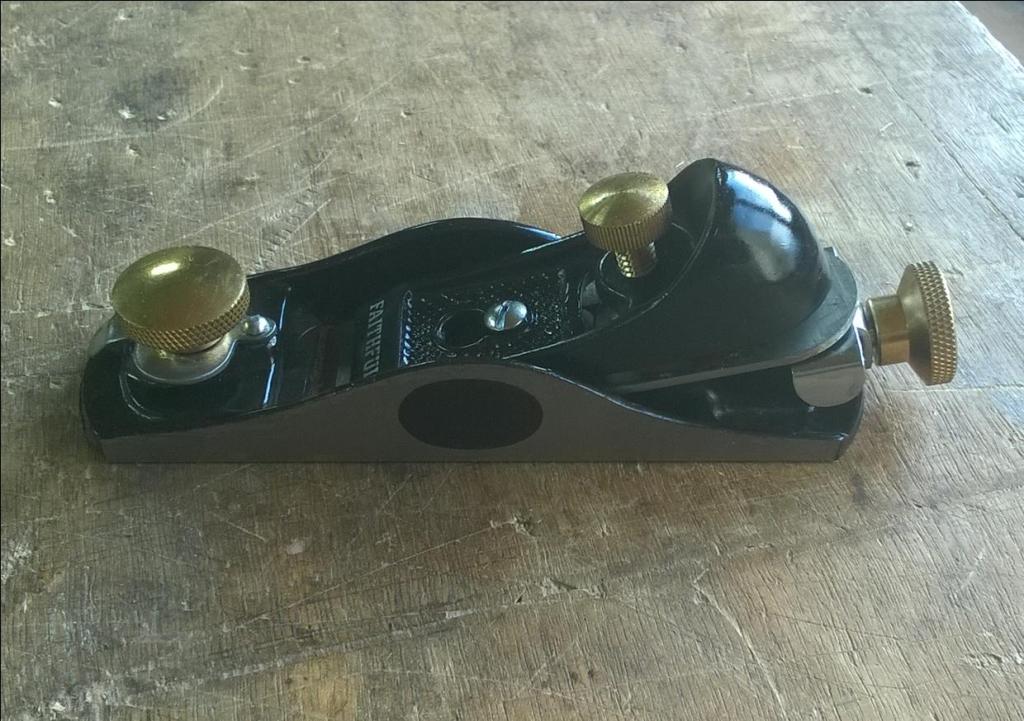
I decided on, and purchased, a small block plane (image above/below) online for the sum of £12 and a few pennies ($15) delivered. Believe me there were cheaper items but solid brass, not plated or cast ‘mystery’ metal, was a must for the furniture (knobs!). A plane with a sheet steel body and plastic furniture will never perform like one with a cast body and brass fittings. Leave that junk well alone. It’s just not worth it. The opening picture shows the item straight out of the box, and from a distance (across the room wearing Granny’s glasses) it looks passable.
However, on closer examination….
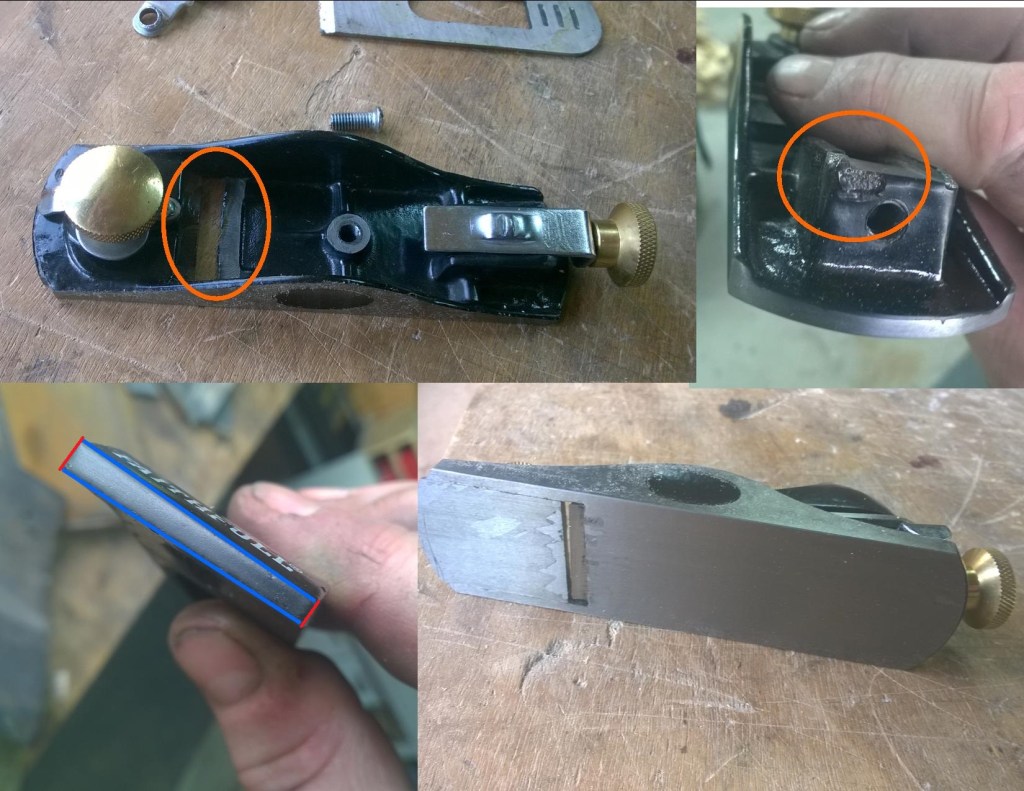
Some of the more obvious crappy bits
The body is covered in thick ugly paint emulating (very poorly indeed) the japanned finish of vintage planes. The mouth – highlighted in orange top left – is badly finished and heavily tarnished. Top right shows the adjuster removed, and speaks volumes. The next image shows the finish on the sole, and lastly the lever cap, the blue lines indicating just how shoddily this item was finished and the crappy angle of the front edge.
These are observations rather than criticisms, and brings up a major point of this article. A better final presentation is just not feasible on a tool costing so little. The money is in the fit and finish of a tool such as a top end plane. Of course the materials used will often be of a better quality but the components are simple and of the same basic design. The hours spent bringing the tool up to standard are expensive when carried out by a skilled craftsman. This process – Fettling – can be achieved quite easily using some simple inexpensive processes. The following three items are must have’s;
- Fine grit abrasive paper – One of those mixed packs for car body prep is fine, ideally up to 5-7000 grit. Cheap on Amazon and loads left over for other jobs.
- A buffing wheel and compound. A small kit with a drill attachment works well. Low cost and multi useful. Those with a rotary multi tool such as a Dremel will already be ahead on this one.
- A small file. The thin diamond needle files or similar are great for this work, widely available and cheap too.
It hopefully goes without saying that you can use other tools and equipment to achieve a result. A corded drill with a bench clamp, or one of the pillar variety, will speed things up. An angle grinder won’t! The lack of precise control has the possibility of really screwing it up, and causing much pain. A wire brush is handy. Ultimately the most widely used resource is going to be elbow grease and patience.
Note – although this project is not about money, the finished tool should hopefully be pleasing, the sort of thing you’d pay very good money for. The plane plus Iron was a little over £20/$25. The consumables you will either have, or if you need to buy aren’t a huge outlay and will be an investment -with luck. You can judge the worth of the efforts at the end.
Stripdown
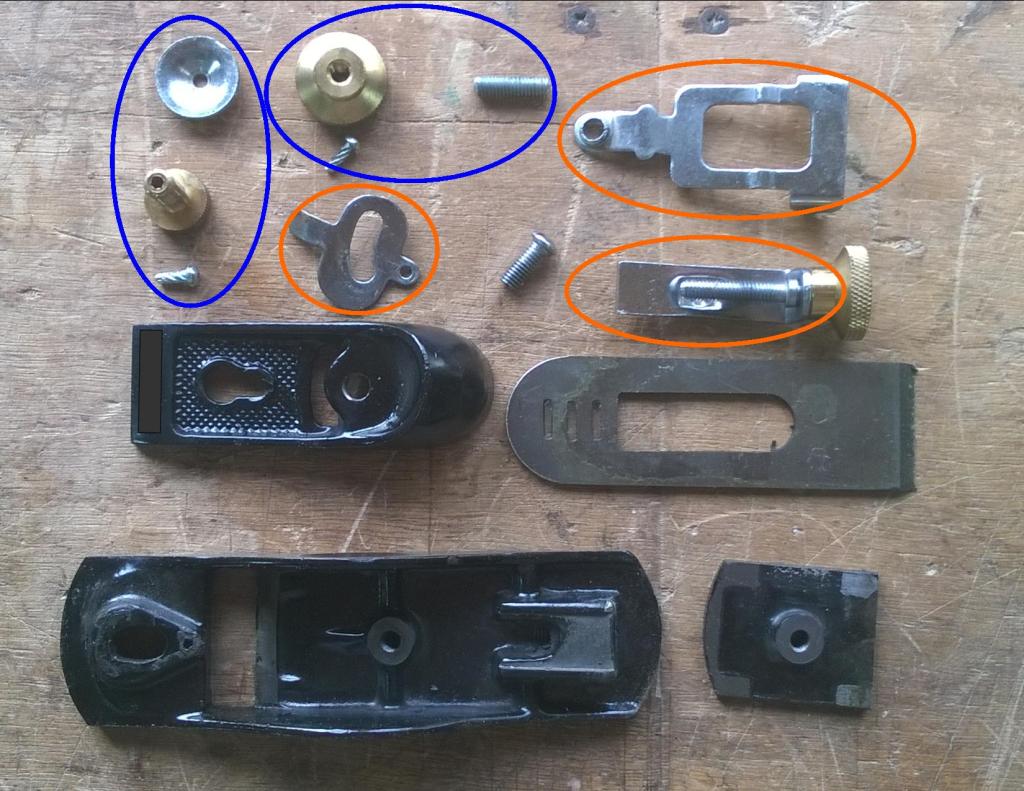
Taking the plane apart is very simple although a few tips may prevent problems later. The two blue ovals identify sets of associated components- lever cap at left and mouth adjuster to the right. Both have simple studs to hold parts in position. You could tap these and replace with set screws but it’s not necessary. They work quite well, and we’re looking to improve what we’ve got and not replace parts. The studs need careful removal with pincers, or pliers, twisting slightly anti clockwise. Do not refit until final assembly
The sheet steel parts outlined in orange need very little work and are very similar to those produced by Stanley or Record. A little filing around the edges to tidy up any burrs is all that is needed. The only major exception is the mouth adjuster on the left. More on that later. The other two are the lateral iron (blade) adjuster and the Iron length adjustment knob at bottom. The latter has it’s knob still fitted as it can be worked on without uneccessary disassembly
The rest is simple and, although the parts may be unfamiliar, we’ll put it all back together later. No worries.
On to part 2 – The work begins.
Images and Article Copyright © 2024 by L.C McCarthy
