3 – Nearly there, not long to go now kids!
The usual safety provisions apply. I won’t insult the capable but for those who are a little vague on what’s under discussion please read the safety stuff on the Information page.
The Finish
Just when you thought I meant the end I’m dashing your hopes and talking about how one might wish the plane to look. Ultimately that is up to the user – unless it’s been selected as a gift for another person – but somebody’s choice one way or another. I’ve refinished quite a few planes over the last twenty five years or more. Most have been 40 years or more in age, but intended for a working life. In other words not of heirloom status – yet. You won’t be destroying any history by applying your own finish.
Paint
I tend to use enamel gloss paint such as Humbrol modelling or metal paint. If available I would normally brush on some rust inhibitor followed by primer. I didn’t do that here as I wanted to keep things simple plus the surface was pretty mint, not a rusty shed find. On top of that would be two coats of your chosen paint. Colourwise, shades such as burgundy, dark green, navy blue or dark grey are my choices. Black and mid blue are avoided as being too widespread. I find variety not only more interesting but also more practical;
“Could you pass me that block plane?”
“The what plane?”
“The small black one.”
“Errr…which one of the seven black ones is it?”
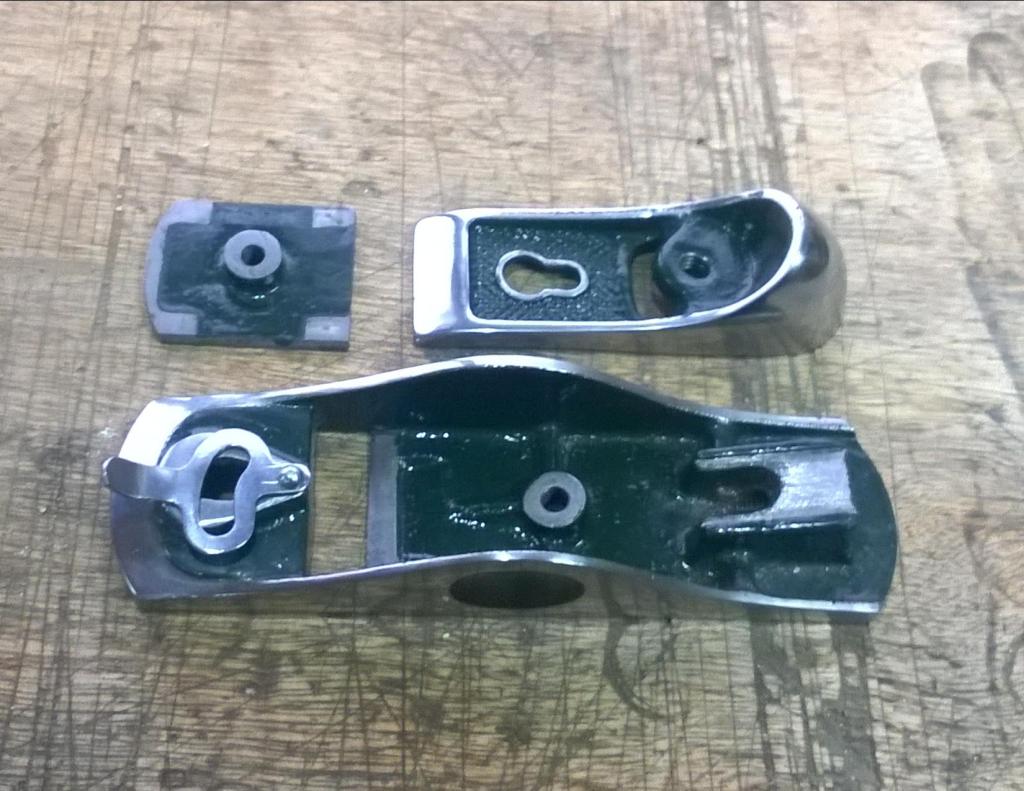
You can leave the item to dry overnight or put it into the oven on a low heat for an hour or two. Do not put it in with tonight’s dinner. The paint needs to cure off properly – i.e allowing all the solvent to leave the paint – before any serious handling or work is carried out. So much good work has been destroyed by handling before it’s ready – the paint smearing, becoming dulled and dirty, nasty fingerprints on a surface that may appear dry and so on – and is very easily avoided. You can work on the other parts (below) while you wait. Apply with a small brush (size 3 to 6 – that is not a 3 or 6 inch emulsion type! ) for best results. Additionally I paint the areas inside the cap and the hidden side of the mouth plate (but not the flattened areas – see 2nd image below). Waste tends to find its way into hidden areas and, with many woods having compounds that corrode or clog metal parts, a layer of paint protects these areas and speeds up cleaning. As you can see I’ve gone green with this little chap.
A good seat is best – with a little adjustment
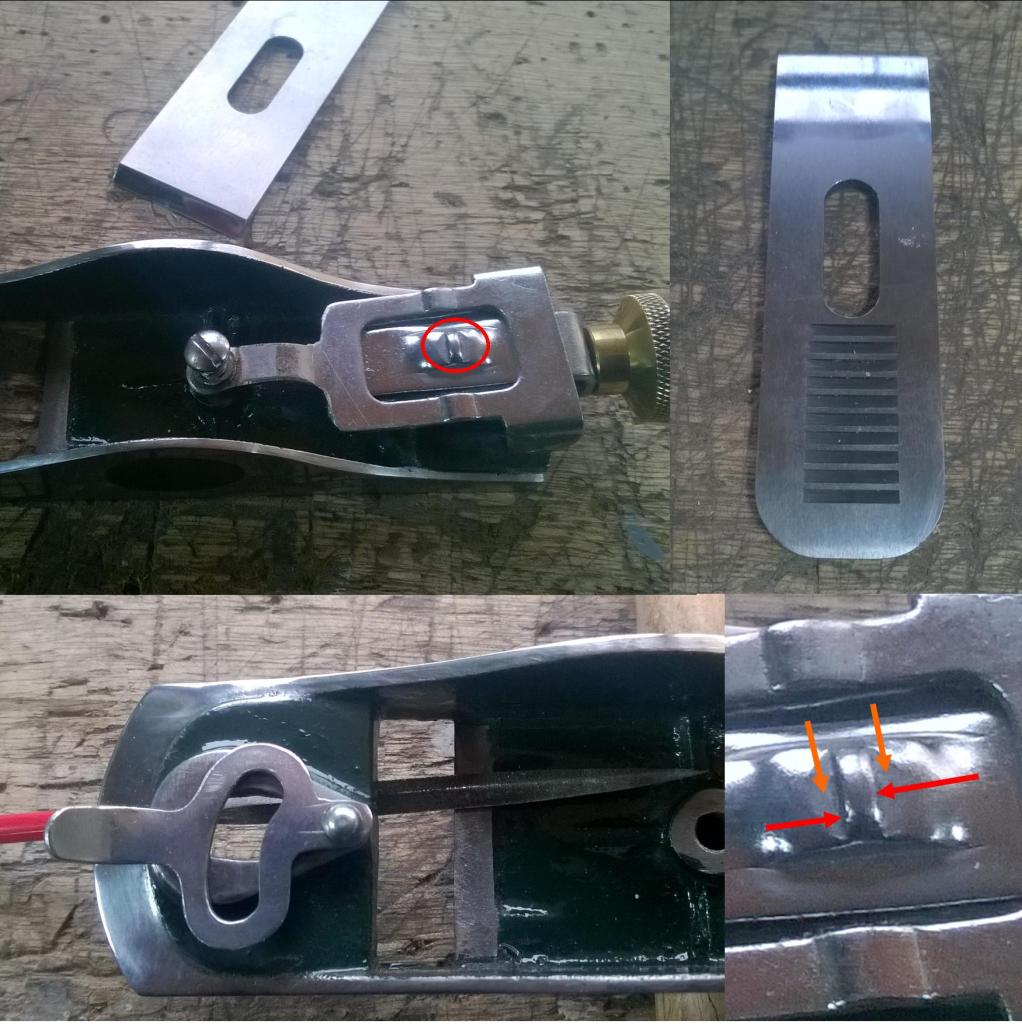
I tend to sort out the internal stuff after painting. Clean up is easier, you can see where you need to go and lose any unwanted paint all in one go. Now your lever cap is flat and square to the iron you need to make sure that the mouth which forms the bottom part of the sandwich – the iron being the meat – is also flat and even. The lower image shows the direction from which filing works best. You’ll need a flat file and it isn’t that difficult as the casting will naturally dictate the file angle. You will feel that yourself with a hand tool. This is why something like a rotary tool is a non starter here – you can’t feel what it’s doing. You need the ‘hand’ feedback to know you are in the correct place. As newly worked metal is bright you can see the high points. Again these cannot be worked on individually as the end result will look like a roller coaster. The surface needs to be flat and uniform to create that perfect sandwich with no gaps, however tiny. Anything that that helps to ensure the cutting edge is firmly and evenly clamped into place increases the performance of any plane.
Note – some will notice the file at bottom left is triangular not flat. Using this enabled me to wedge the body in place for photographing as I only have the standard issue of two hands. Flat is the preferred option to prevent damage. The paint on the cap screw mount was removed, of course (on right hand side of same image).
The top image shows the lateral adjuster with the iron adjuster underneath. The iron adjuster sits on a small cast ramp (see image below – orange circle) which required little work apart from a quick filing to check it was flat and free of bumps. The pressed steel adjuster itself just needed attention to the area ringed in red. This little nub engages with the groves on the bottom of the iron. On adjusting for thickness of shaving ‘backlash’ is usually noticeable. This is where the nub is not a tight fit in the iron groves and adjustment is loose until it takes up any slack in the grove. This is one area where a top quality plane will always trump a cheaper one – no pressed parts there! A turn or more is often needed before the iron starts to move either way. Apart from fabricating a new part – beyond the goal of this project but feasible – little can be done. However, I file down the flat horizontal surfaces (orange arrows) to make sure the Iron is firmly seated. Because of backlash, filing the vertical surfaces (arrowed in red) is to be avoided, it would only increase the slackness. The nub itself can come under great stress if the lever cap is not tightened post adjustment. It wears as it takes the full impact of every pass and the backlash just worsens. A well fettled plane reduces any stress as it all fits better and tighter together. The life of the tool is lengthened and performance enhanced.
Sorting out your furniture
This is pretty straight forward. The same idea relating to surface polishing, stated above, applies here too so the first task is to smooth and polish the brass adjusters. They will tarnish over time but a little work now will mean they will still look smart even though you aren’t going to be repolishing them every few weeks. Left as fresh out of the box they tend to look stained and patchy after a while. All that’s required is to remove any milling marks, rough patches or staining with 800 grit paper or finer and follow up with a good buff.
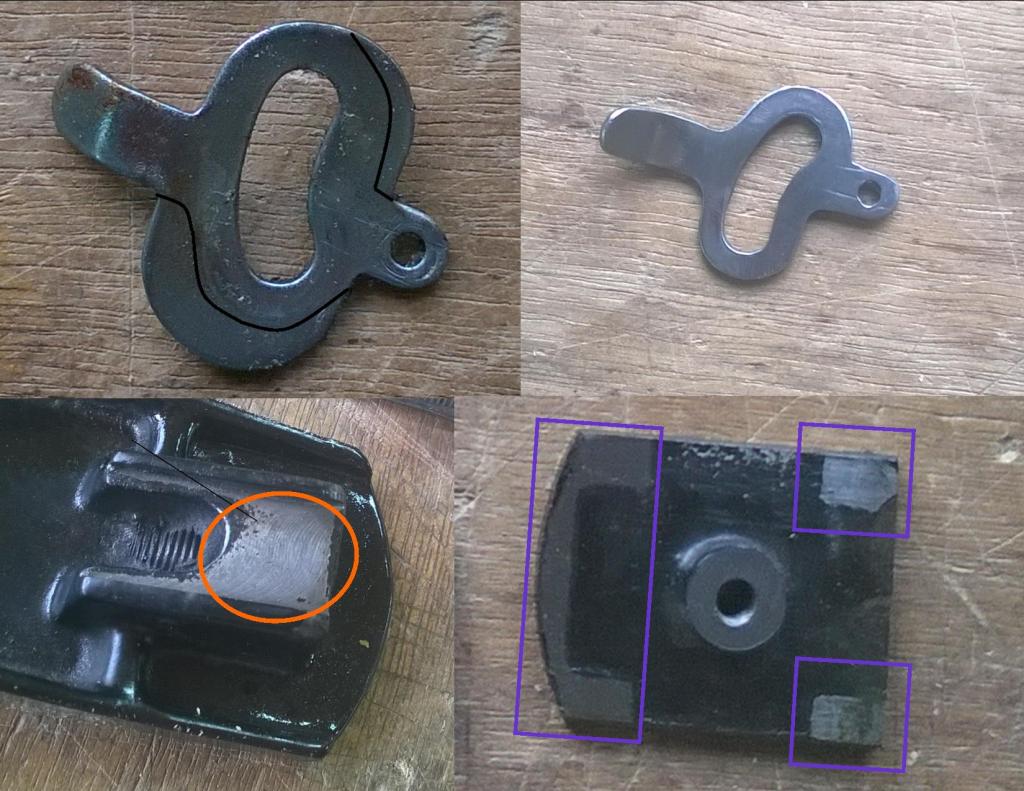
The only item that required serious modification was the mouth adjuster. The locking knob was polished and looked fine. The adjuster not so much. Ugly with far too much body (Enough about my first lover – let’s move on). The image shows the material removed – along with the free rust it came with. You can get away with a power tool here – bench grinder, stone in a drill etc – as there’s a fair bit to get rid of, but go steady or it’ll look skew-whiff if too much is taken off. It is not a highly stressed part and merely cams the throat/mouth plate to open and close the distance to the Iron edge (this ‘chip’ mechanism impacts how the shaving comes away from the wood surface and therefore the finish). The work on the plate and surface beneath the adjuster should make this silky smooth, far beyond it’s previous capability.
Any Old Iron?
Certainly not my good man! Everything else on this plane is now fit for purpose apart from the Iron. A cheap Iron on a well sorted plane is like putting pram wheels on a Ferrari. Looks like crap and performs in a similar way, chattering unpleasantly like a flock of parrots on speed. Keep the old one as they make good scrapers and replace it with something better. I found a Ray Iles Iron, 1 3/8″ wide and 1/8″ thick, online for £10 ($13). A fortunate find as they are usually quite a bit more. This addition lies at the heart of any performance you could hope to gain. Any plane is enhanced by a good thick Iron, which is why all the expensive tools have one. The image (2 up) shows a polished cutting edge/bevel, courtesy of a felt wheel. This is a thirty year old personal choice – for chisels too – and has never let me down yet. It’s not a requirement for a good result but the perfect surface given on woods such as oak is perfection. I’ve been unable to capture it on camera but the planed surface reflects like glass.
It may be noticed that the aftermarket Iron (2 images up) has a narrower main slot and many more adjustment slots than the original back on page one. This added precision and fit makes a noticeable difference.
Now we have arrived at reassembly time. You will now be very intimate with all the relevant parts. The grey metal residue on your hands will indicate just how familiar the parts have become. That sounds a bit weird so insert shocked emoji here……. Anyway, putting the plane together should be a breeze.
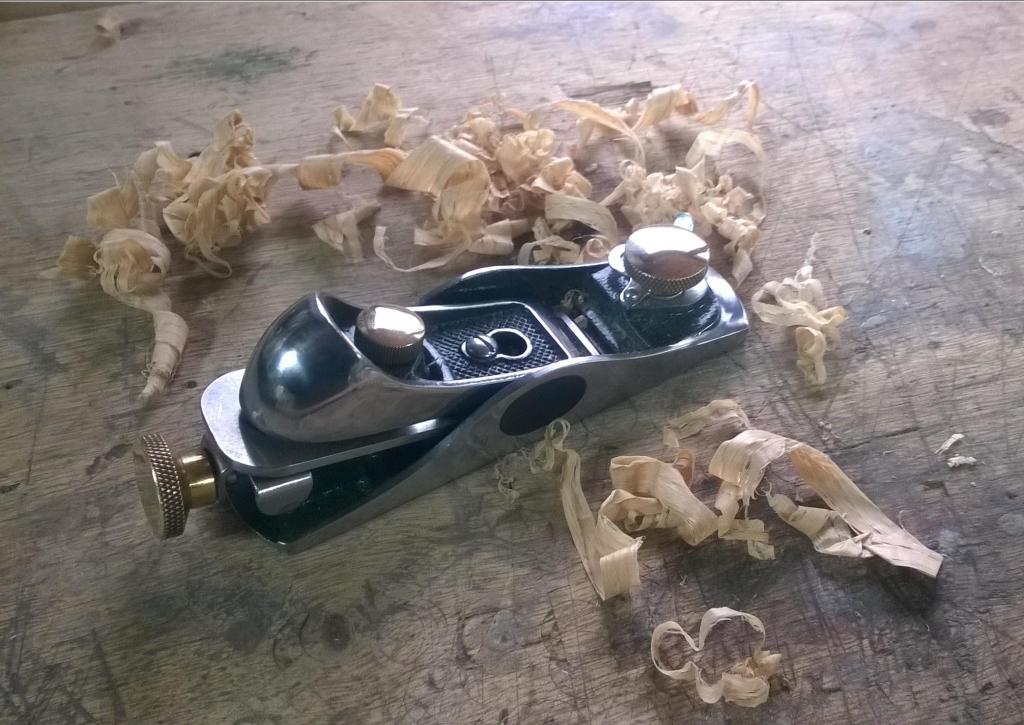
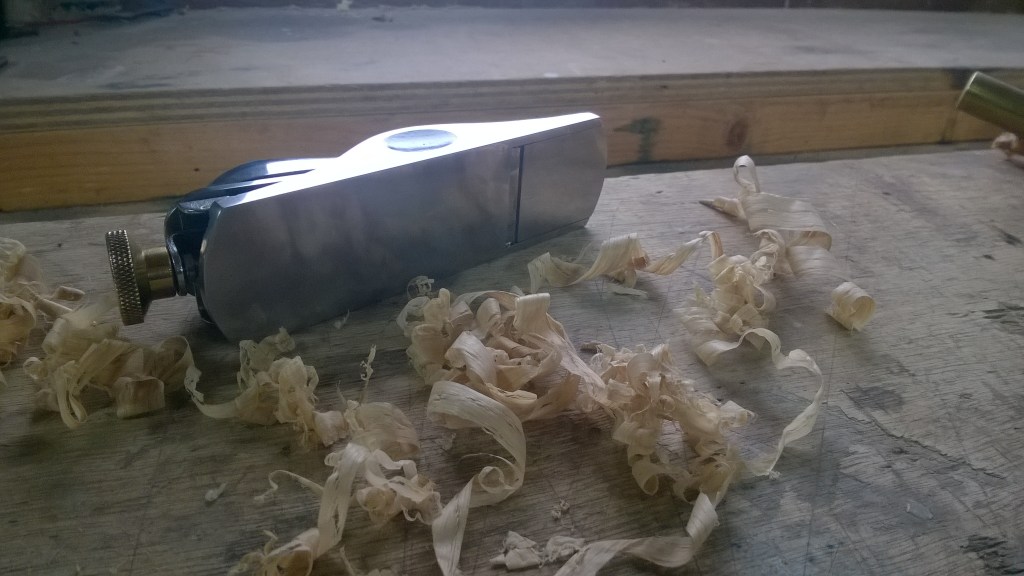
Hopefully, it should look something like this.
Is it worth the work?
In a word, yes. Of course if you value or justify everything in pennies then the answer is no. If, however, you see the finished plane as symbolising your ability, applying time and effort, to take a poor performing, ugly and undesirable tool and transform it into a visual and practical delight that brings a smile to your face everytime you pick it up – if you feel pride as it silkily glides across your workpiece, whilst watching that gossamer light shaving float gently to the floor – then it’s an undeniable – Yes!

Images and Article Copyright © 2024 by L.C McCarthy
