Power Supply Unit – DC repair – 2
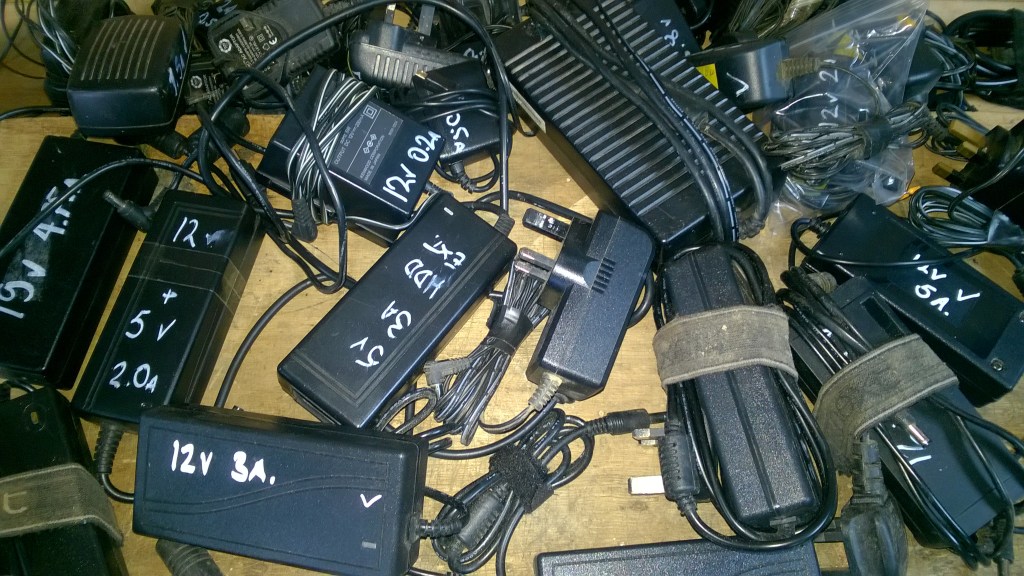
Got one of these that has failed? A fairly common item on cctv systems, monitors, stereo systems, laptops, games consoles, ext HDD etc…..
It’s pretty easy to get a replacement fairly cheapy. However, there are retailers who will claim you need to purchase their brand replacement for your 12v 5A psu as other 12v 5A psu’s – that have the same specification and fittings and are identical, down to the same manufacturers name on the case – won’t do.
For me disadvantaging myself waiting for someone to post out an item – then hoping a navigationally challenged delivery person will find my house – GPS? – is not my thing. It’s only compounded by the wasted days and time faffing about ordering. So why not fix it yourself?
Note – If you get a CCTV package, swap the wall power plugs for one 12v 5A (for example) PSU of the type under discussion here (bottom of image above). Many common camera faults are down to insufficient power, so making sure you have enough power to run cameras and the main unit is wise.
These units are just for converting mains voltage(AC) into DC power. I’ve fixed a lot of these and 90% of the faults have been capacitors – the type known as electrolytic. The ‘fails’ are usually budget versions, well shy of the quality or capability of the better known component makers; Rubycon, Kenwood, Nippon, Panasonic and so on…
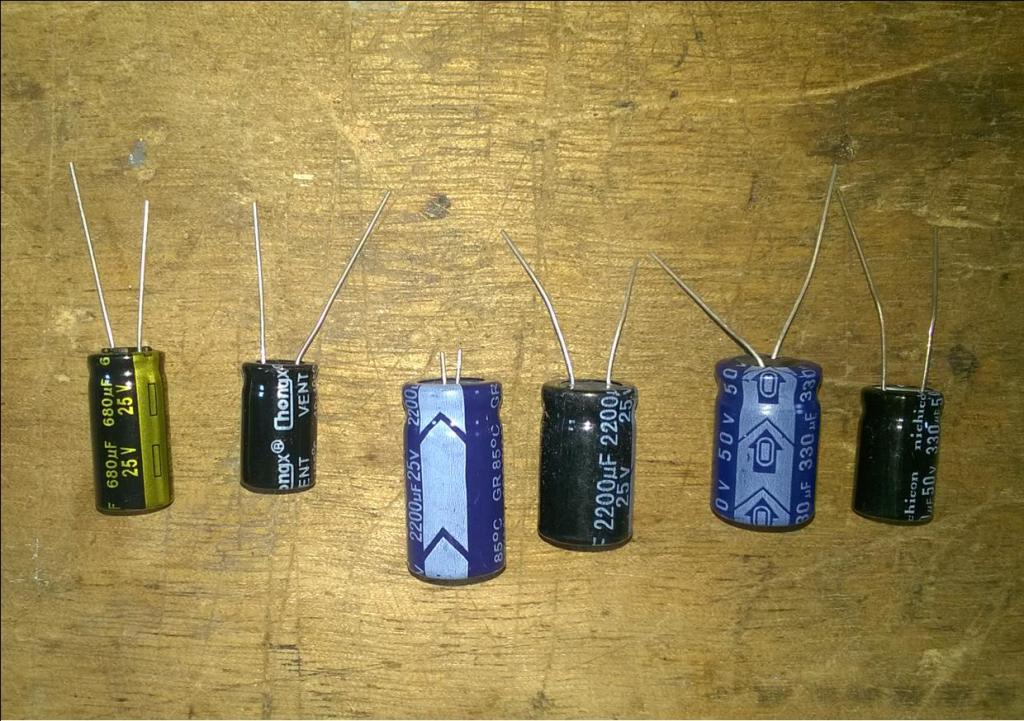
So for example, I regularly come across 10v capacitors in 12v power supplies – mostly DVD’s, Freeview boxes, Music Centres etc. They will last a while but degrade fairly quickly as unsurprisingly they are being stressed beyond stated tolerances. As tolerances are a little higher than stamped on the capacitor you can push things a little but sooner or later it’ll go pop, and the item will fail. I usually fit a 16v in these cases which solves the problem. No – they won’t fit these at the outset, it’s not a component cost thing, it’s more that the industry knows we accept a limited life expectancty on such items/equipment – and will go buy another!
Capacitors of all types are rated by voltage and capacitance (Farad – Named for Michael Faraday). They are used to smooth out current to give a constant flow or provide a higher current to start/run electric motors etc. The latter mode is used widely on washing machines, shower and central heating pumps, compressors and other equipment. It’s a common fail item. Sized from a few millimeters to huge! They are also used in other roles – interference suppression for example – but that’s beyond current scope.
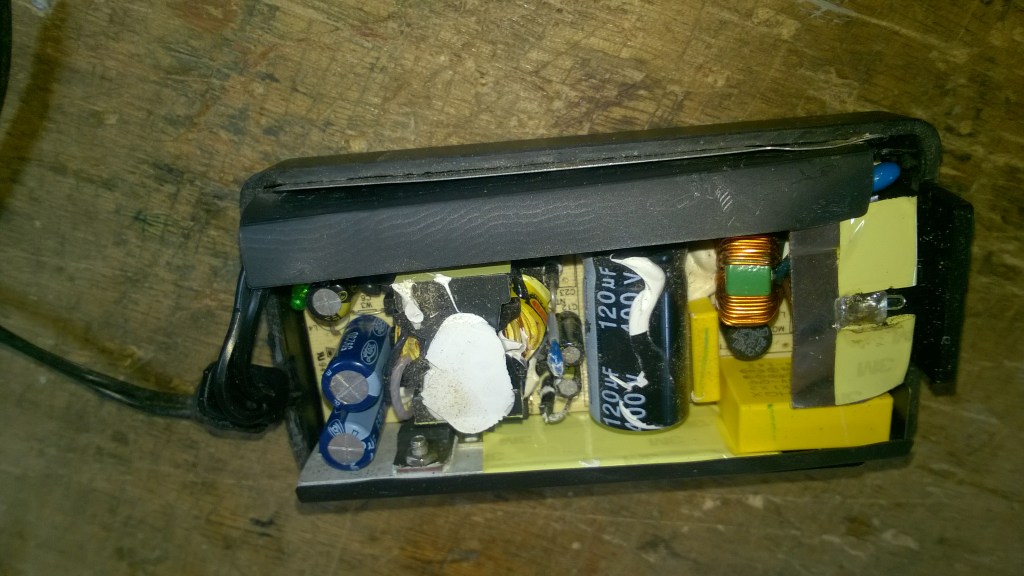
So, let’s have a look at a poorly PSU. Opening these items up is not difficult. Carefully popping the case open with an old table knife or similar will immediately bring the board into view. It may be the case is secured by screws but these days less and less. Some maybe glued or heat sealed, but that is more common in the ‘wall warts’ – those black lumps that clutter your sockets.
At either end, sometimes both Input and output, a clump of capacitors can be found. The majority of faults are found here. You may already suspect the location because of visible damage on the outside of the casing – dicscoloured or matt areas, perhaps even a little melted or sunken. There may be a strong electrical burning smell which may lead you to expect extensive damage, but this often is not nearly as bad as you may envisage.
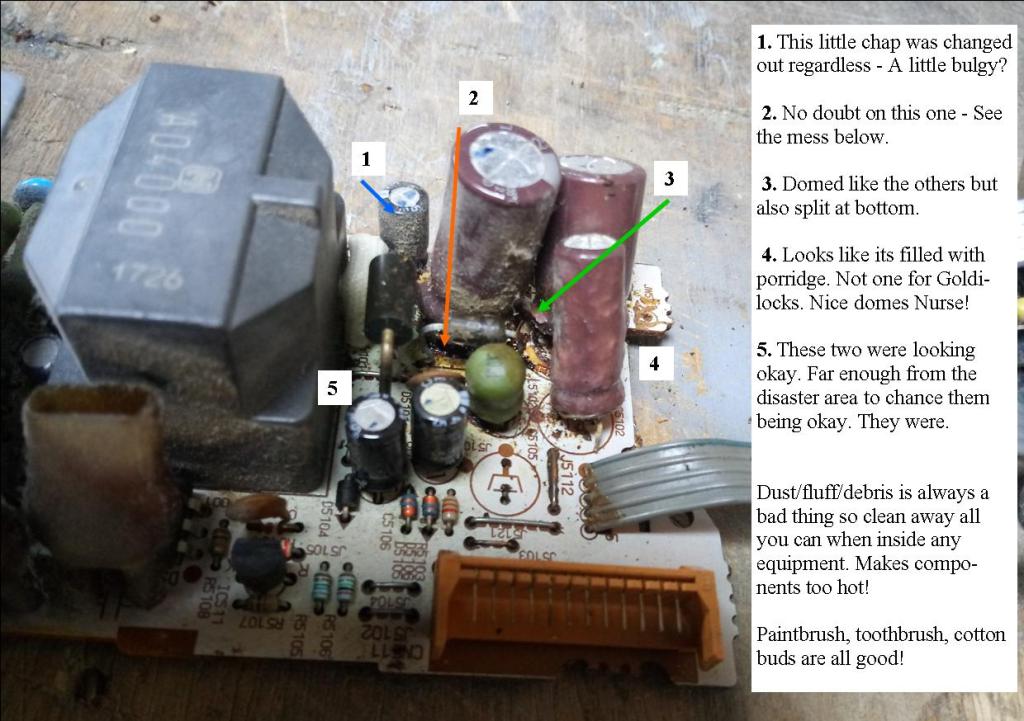
The offending item may be blown – a domed top or bulged/burst side, it may look burnt or discoloured, the plastic skin melted, or there is residue or scorching at the base. Sometimes little is visible, although internal failure is likely. The flip side of the board may have evidence. If there is only a couple of capacitors, and I have replacements, I just swop them out, then test the old to see which are good and which are bad, finally putting the good in the spares box. Why this way? – Because to test they’ll all need to be removed and tested separately (If your meter doesn’t do capacitance just replace all). You probably won’t have thousands of pounds worth of test equipment lying about, so do a reset with fresh parts and move forward.
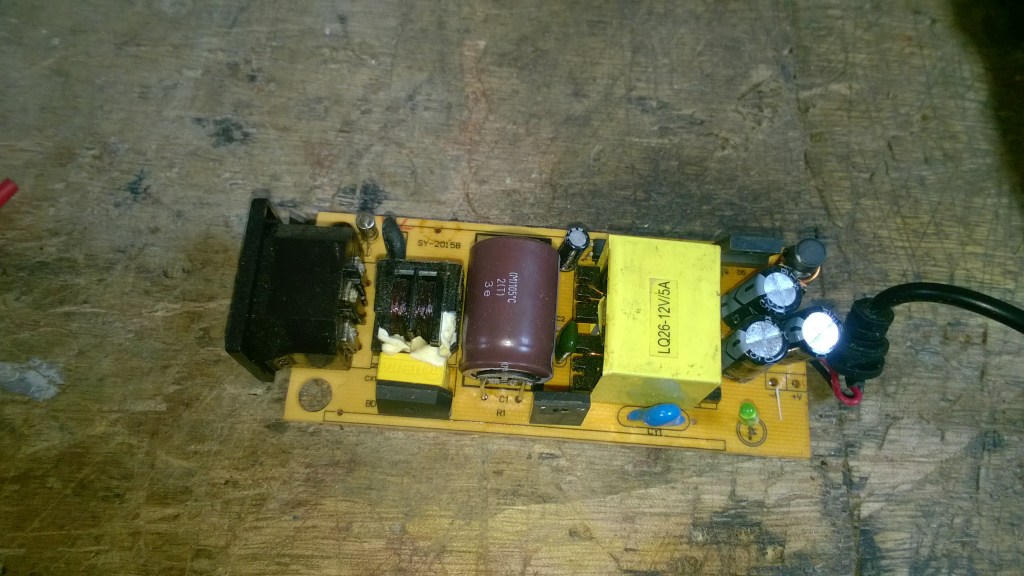
This is a repaired 19v monitor psu. About 4″ x 2″ – I’ve replaced the two blue caps to the left. This is a fairly small sized unit providing constant power. The aluminium heat sink visible at bottom (there’s another under the black thermal layer at the top), plus the heat reflector at right, hints that this might get pretty warm. Cheap components won’t cut it. These quality replacements fortunately fitted the space.
Where’s my parts coming from?
Buying a box of mixed capacitors is fine – and cheap from Jeffy B’s. They may be of the mediocre quality your replacing, but will get it back up and running. Just make sure the selection has the values you need! You may find buying nicer quality is better, although they tend to be larger dimensionally (for the same value) and may not fit the space or case. I salvage a lot of parts from obsolete or knacked items. Old VCR’s, which tend to be bombproof, are likely to be full of high quality components (not guaranteed to fit!). Yep, it’s in a box in the attic – you can’t quite remember when/where you saw it last, but don’t worry, four hours – less if you leave the kid’s old toys alone – of dusty rooting around will produce it.
You may decide to have a crack at the large collection of old psu’s you’ve been keeping in a box -always stopping short of chucking them out. That’s why you kept them. You’ll be a god when you tell the youngsters, ‘Hey, Guess What? I’ve got your old playstation up and running!’ …..Oh…, judging by the blank looks, maybe not.
Changing parts
I’m not doing a soldering guide here, you can find good ones elsewhere. Suffice to say it’s not difficult. My goal is to get equipment back up and running. I will point out the capacitors have a stripe adjacent to the negative ‘leg’ – this will go into the shaded area hole on the board when you replace. Taking a snap of the old ‘caps’ in position before you change them out is good confirmatory practice.
Once swapped out – and tidied up i.e excess wires clipped and board dusted – hopefully it should work. If not, desolder the caps and put old and new away for the next fix.
I’m covering the fault that happens 90% of the time in my experience. Obviously other faults will occur but unless it’s a visible, cheap component it’s not worth the effort or cost. You have to draw the line somewhere. I don’t always suceed but I do get more wins than losses….
